Slat Wall Panel Creator
Design your wall slat panelling and scroll down to place your order.Desktop: Click and drag to rotate, scroll to zoom, right-click to pan.
Mobile: Swipe to rotate, pinch to zoom, two-finger drag to pan.
Materials Required
How Will I Receive My Order?
Your slat wall panelling will be delivered in full-length strips (2440mm or 3050mm), as selected. This allows for flexibility on-site, giving you the control to cut each strip to the exact dimensions required for your custom layout.
What is the Length Option?
Wall panelling strips are supplied in two sizes, 2440mm (2.44m) and 3050mm (3.05m). You'll receive the full length of panelling required for your wall according to your specifications, regardless of which length you choose. The amount of excess material may vary depending on the option you choose, and the price will also vary. Shorter lengths are often more suited for smaller projects and are easier to handle, whereas longer lengths may require fewer cuts.
What is the Finish Option?
The finish option allows you to customise the finish of the panelling strips. You can choose to have the strips undercoated (sprayed white, sanded, with primer and undercoat applied), primed (sprayed white with primer applied), unprimed (left as bare material), or matt grey.
Excess Material
Excess material indicates the length of material which is not required for your slat wall configuration. However, during cutting and installation, material will be lost, so the excess material ensures you have enough to complete your project. If you're unsure, we recommend adding a couple of extra panelling strips in the checkout.
Slat Wall Details
Slat Width: This is the width of each individual slat in your design. Standard widths range from 20mm to 120mm.
Slat Thickness: This is the thickness of the slats, affecting how far they protrude from the wall surface. Standard thickness is 9mm for most slat wall panelling. For a cost-effective approach, choose 6mm. For a sense of depth and weight in your panelling, choose 12mm.
Gap Width: This is the space between each slat. Wider gaps create a more open, spacious feel, while narrower gaps create a more solid appearance.
Note: Skirting board is not included in your order, and is available at our sister site skirtingworld.com.
Slat Panelling Strips
Total Length: 0 m
Width: 50 mm
Thickness: 9 mm
Number of Slats: 0

Creating Your Perfect Slat Wall
Our interactive calculator helps you design a bespoke slat wall panelling configuration tailored precisely to your space.
Visualise
See your custom design in real-time with our 3D modelling tool.
Customise
Adjust slat dimensions, spacing, and position to achieve your desired look.
Order
Get precise quantities calculated automatically and order directly.
How to Use the Calculator
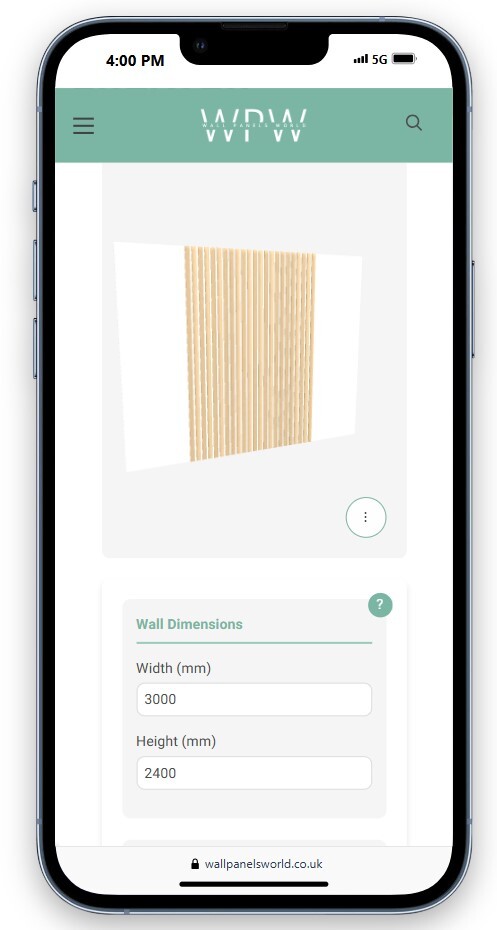
Set Wall Dimensions
Enter your wall height and width in centimetres. These measurements will form the basis of your design canvas.
Configure Slat Parameters
Select your preferred slat width, thickness, and gap width. The configuration automatically updates as you adjust these values.
Wider slats (95-120mm) create a bold statement, whilst narrower slats (20-35mm) offer a more subtle, textured look.
Adjust Panel Dimensions
Set your panelling area size and position. Use the panel indicator to visually position your slat wall on the larger wall surface.
The quick sizing buttons (Full, 1/2, 1/3) help you create common design patterns like full walls, half-height panelling, or feature sections.
Add Obstructions (Optional)
Account for windows, electrical outlets, or architectural features by adding obstruction areas that the calculator will work around.
Customise Your Order
Select your preferred finish and strip length. The calculator will determine the exact quantity needed based on your design.
Place Your Order
Review your materials list, download your bespoke installation plan, and complete your purchase.
Slat Wall Design Inspiration
Transform a plain wall into your room's focal point with a full-height slat installation. Choose wider slats (70-120mm) for a dramatic, architectural presence or narrower slats (20-35mm) for subtle texture and warmth.
Popular applications include living room feature walls behind televisions, bedroom headboard walls, and home office backdrops for video calls.
Half-height slat panelling creates a sophisticated wainscoting effect that works beautifully in hallways, dining rooms, and bathrooms. This approach offers texture and interest while allowing for contrasting wall treatments above.
The "1/2" button in our calculator makes this design particularly easy to configure. Consider using a deeper slat thickness (9-12mm) for a more pronounced shadow line.
Create striking geometric designs by installing multiple smaller slat panels in different areas of your wall. Use our calculator to design several distinct sections and position them to form patterns.
This approach works particularly well in contemporary spaces and can be used to frame artwork or to draw attention to specific parts of a room.
Position a medium-sized slat panel centrally on a wall to create a floating "island" effect that frames a bed, console table, or seating area. This understated approach offers architectural interest without overwhelming the space.
Use the panel positioning controls in our calculator to centre your slat design precisely where you want it.
Materials & Finishes
Unprimed MDF
Our raw MDF option offers the most economical choice. Ideal for those planning to paint to match a specific colour scheme. Requires priming before finishing.
Best for: Budget-conscious DIYers comfortable with full preparation.
Primed MDF
Factory-primed slats save preparation time, with a consistent white base coat ready for your chosen paint finish. Requires light sanding between paint coats for optimal results.
Best for: General DIY projects requiring a reliable base for painting.
Undercoated MDF
Our premium preparation option includes primer plus undercoat, providing excellent coverage and a smooth, even surface ready for a final topcoat.
Best for: High-quality finishes with minimal preparation work.
Matt Grey MDF
Factory-finished in a contemporary matt grey that works with most interior colour schemes. Requires no additional painting – simply install and enjoy.
Best for: Quick installations and modern, minimalist interiors.
Installation Tips
Planning & Preparation
- Acclimate your slats in the installation room for 24-48 hours before fitting.
- Ensure walls are clean, dry, and properly prepared with any necessary repairs.
- Create a full-scale template if working around complex obstructions.
- Pre-cut all slats before beginning installation to ensure consistent sizing.
Installation Methods
Adhesive Mounting
Pros: No visible fixings, cleaner finish
Cons: Less suitable for heavier slats, harder to adjust
Recommended for: Lighter slats (6-9mm thickness)
Pin/Nail Fixing
Pros: Secure, adjustable, works for all thicknesses
Cons: Requires filling and painting of pin holes
Recommended for: 12mm slats and above
Achieving Perfect Spacing
- Create spacing guides from scrap material cut precisely to your gap width.
- Work from the centre outward to ensure symmetrical spacing at edges.
- Check spacing measurements every few slats to prevent cumulative errors.
- Use laser levels to maintain perfect horizontal and vertical alignment.
Working Around Obstructions
- For electrical outlets, measure carefully and use a jigsaw for precise cutouts.
- When working around windows or doors, consider terminating slats with a vertical trim piece for a cleaner finish.
- Use the obstruction feature in our calculator to plan your slat layout around permanent fixtures.
Finishing Touches
- Fill any nail holes with colour-matched wood filler for an invisible finish.
- Sand between paint coats for a professional, smooth result.
- Apply caulk to the top edge of your installation for a seamless transition to the wall.
- Consider adding a narrow trim piece at the top of half-height installations.
Frequently Asked Questions
Our calculator automatically determines the exact quantity of slat strips needed for your design. We recommend adding 10% extra for wastage, especially if this is your first installation. The calculator also accounts for the length of strips (2440mm or 3050mm) to minimise waste.
Slat width is largely a matter of aesthetic preference, but here are some general guidelines:
- Narrow (20-35mm): Creates a finer, more detailed texture. Ideal for smaller rooms or contemporary spaces.
- Medium (50-70mm): The most versatile option, offering distinct slat definition without overwhelming the space.
- Wide (95-120mm): Creates a bold, architectural statement with deeper shadows. Works well in larger rooms.
Use our 3D visualiser to experiment with different widths and see how they look in your design.
Yes, MDF slat walls can be installed in kitchens and bathrooms, but proper sealing is essential. We recommend:
- Seal all sides of the MDF with a moisture-resistant primer before installation
- Use moisture-resistant adhesive for mounting
- Apply at least two coats of moisture-resistant paint or sealer after installation
- Maintain good ventilation in the room to prevent excessive humidity
For areas with direct water exposure (shower surrounds, behind sinks), consider our PVC wall panels instead, which offer complete waterproofing.
We offer three thickness options, each providing a different visual effect and practical considerations:
- 6mm: Our most economical option. Creates a subtle shadow line and works well for decorative applications where depth isn't critical.
- 9mm: Our standard and most popular thickness. Provides a good balance of visual depth and practicality.
- 12mm: Our premium option creates the most pronounced shadow effect. Ideal for feature walls where you want maximum visual impact.
Thicker slats also offer increased durability and are easier to install with pins/nails if preferred over adhesive.
For professional-looking corners and edges, consider these approaches:
- Internal corners: Either butt the slats against each other (simplest) or use a corner trim piece for a cleaner finish.
- External corners: Mitre the slats at 45° for a seamless wrap-around effect, or use an external corner trim.
- Edge finishing: For exposed edges (e.g., when the slat wall doesn't extend to another wall), consider adding a vertical trim piece for a finished look.
We offer compatible trim pieces that can be added to your order for these specific finishing requirements.
Yes, while our calculator is designed for vertical slat arrangements (the most common application), the same materials can be installed horizontally. Simply rotate your mental picture of the design 90° and order accordingly.
For horizontal installations, we recommend:
- Using a spirit level for each slat to maintain perfect horizontal alignment
- Starting from the bottom and working upward
- Considering a slightly wider gap between slats (20-25mm) for visual balance
Horizontal slats create a different visual effect that can make a room appear wider – an excellent option for smaller spaces.
Ready to Transform Your Space?
Use our calculator above to design your perfect slat wall and order precisely what you need.
Slat Wall Designer
Mobile Interface
