Posted by Wall Panels World on 1st Aug 2025
Wall Panelling Kits | Everything You Need To Know
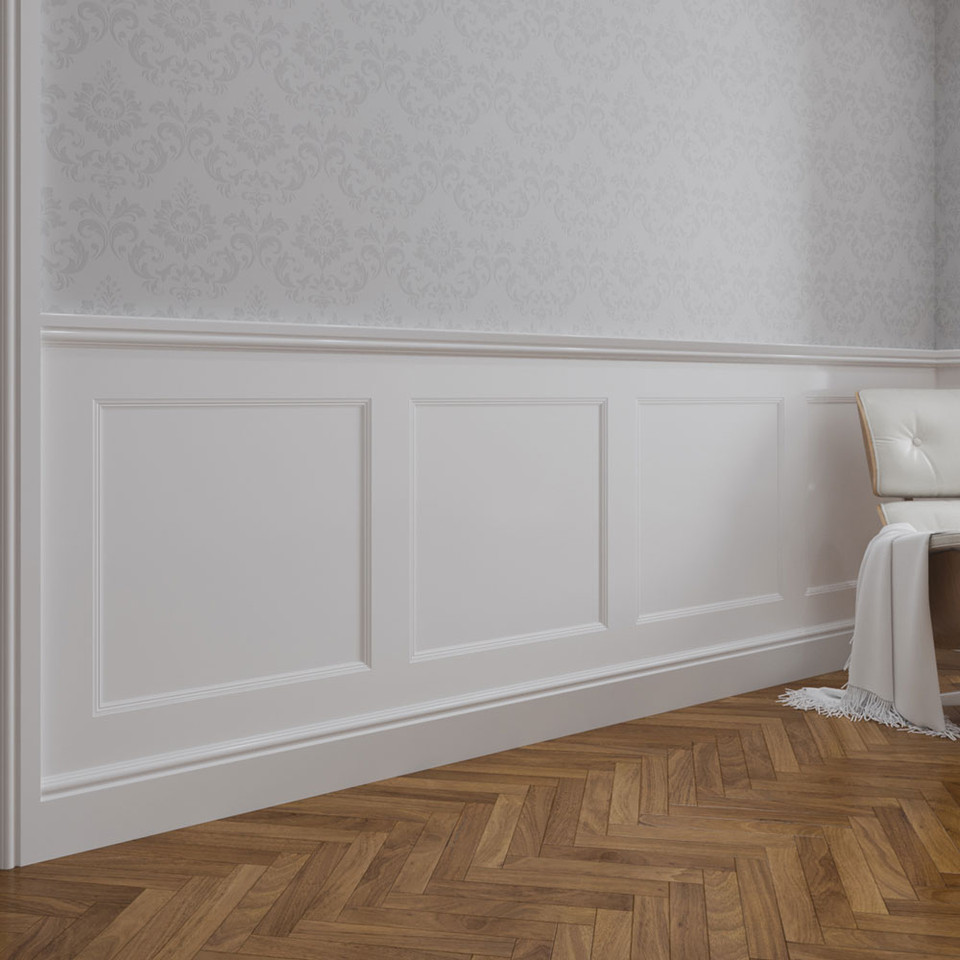
Wall panelling kits contain the MDF strips, mouldings, and matching pieces needed to create panelled walls. Each kit includes components cut to work together, with the main assembly and fitting work done on-site.
Made-to-order: Kits are machined when ordered from MDF stock. Components arrive partially cut but require final sizing, mitres, and fitting work on-site.
How kits work
A wall panelling kit provides the matching components for a specific panelling design. Rather than sourcing individual strips and mouldings separately, everything coordinates to create the intended pattern.
Most kits include 95mm square MDF strips for the main framework, decorative panel mouldings to create recessed sections, plus matching skirting board and dado rail pieces. The components arrive cut to standard lengths that work with typical room dimensions.
The MDF is moisture-resistant and machines cleanly, avoiding the knots and grain variations that can complicate solid wood installations. Everything accepts paint well and maintains dimensional stability in typical indoor conditions.
Installation involves cutting components to fit your specific wall dimensions, creating mitre joints at corners, and fixing everything in place with adhesive and pins.
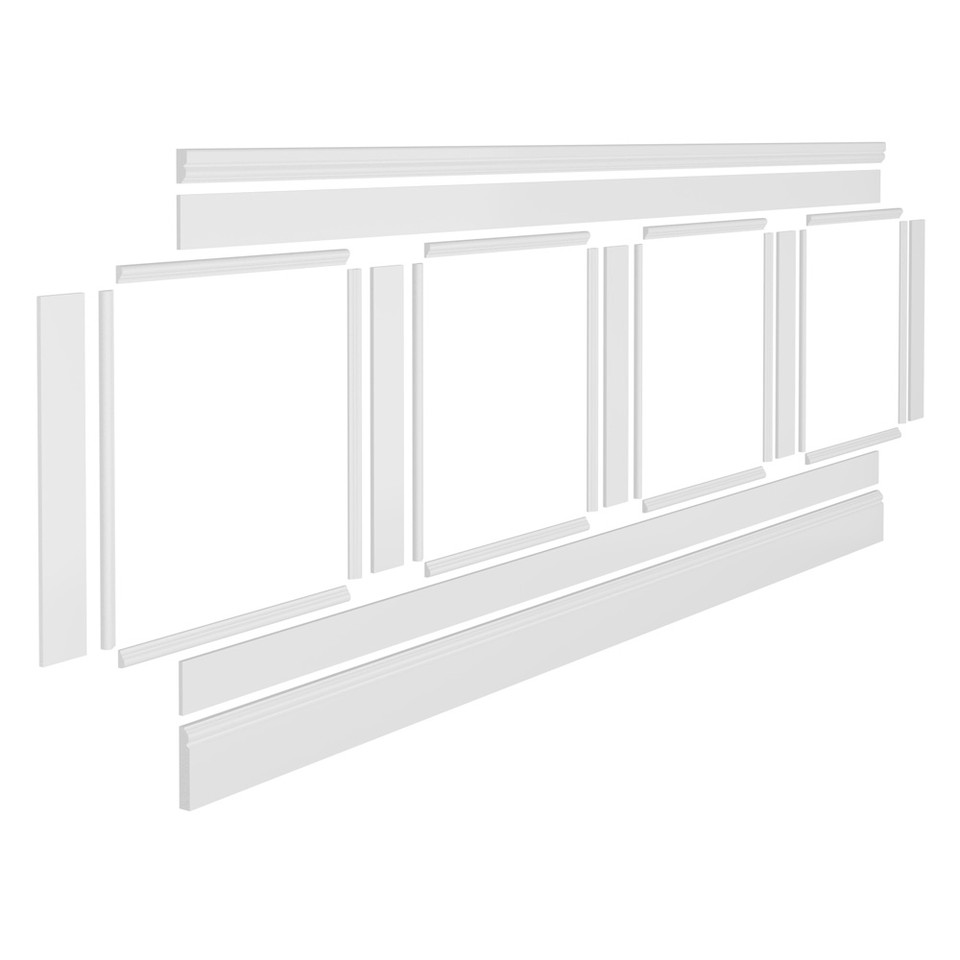
What's in a typical kit
- Main panelling strips (usually 95mm wide × various lengths)
- Panel mouldings in either 324 or Inset profile for creating recesses
- Matching skirting board to coordinate with the panelling design
- Dado rail to cap the top of the panelling
- Optional 9mm backing sheet for uneven walls
- Choice of finish from raw MDF to matt grey topcoat
Popular kits
Here are some of our most popular wall panelling kits, each designed for different styles and coverage requirements:


Explore Our Complete Range
From shaker styles to decorative classics, we offer over 15 different wall panelling kits to suit every interior design preference.
View All Wall Panelling KitsWorking out quantities
Getting quantities right prevents material shortages and reduces waste. Each kit specifies its coverage area, making calculation straightforward.
Standard kit calculation
Divide your wall area by the kit coverage, then round up and add a small buffer:
Example calculation:
Wall: 4m wide × 2.4m high = 9.6m²
Classic Kit covers: 7.2m²
Required: 9.6 ÷ 7.2 = 1.33 kits
Order: 2 kits (rounded up with buffer)
On-page calculators
Each kit product page includes a simple calculator to work out how many kits you need for your specific wall dimensions.
Just enter your wall measurements and the calculator shows exactly how many kits to order, taking the guesswork out of planning.

Custom layout calculators
For custom designs, the advanced calculators work out material requirements based on your specific measurements and panel arrangements.

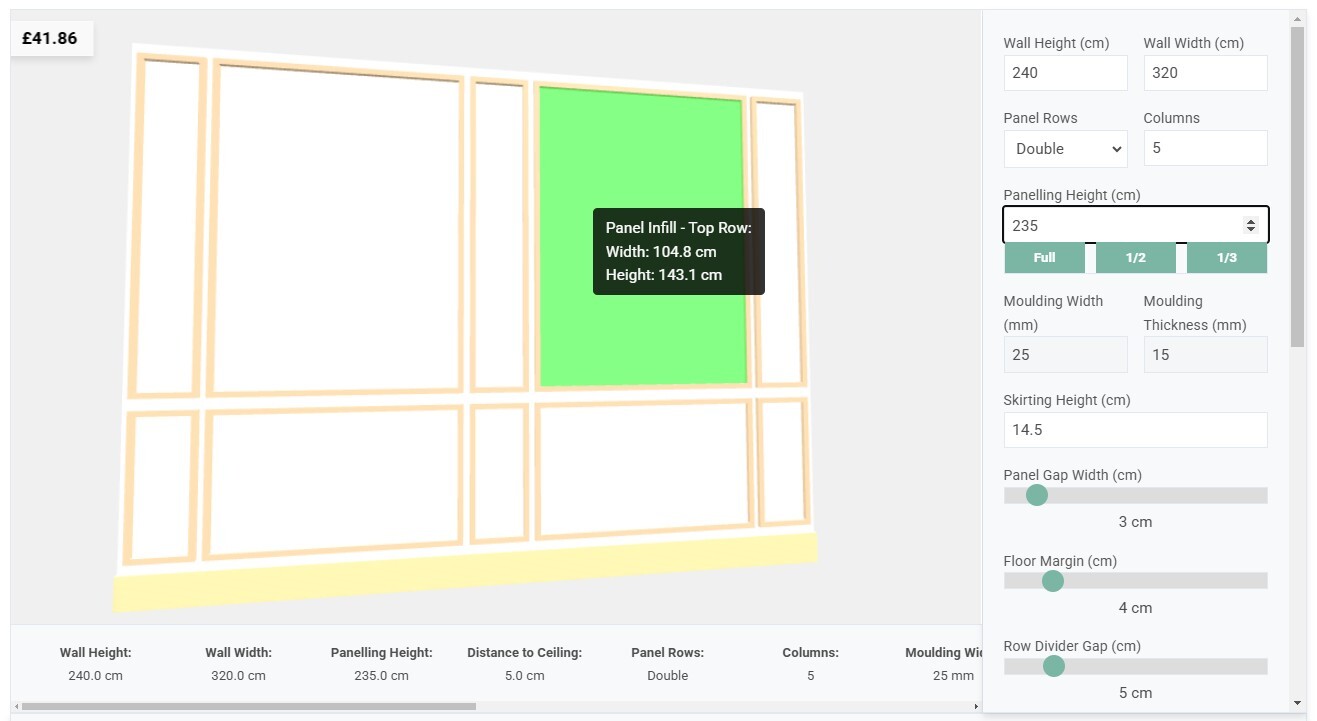
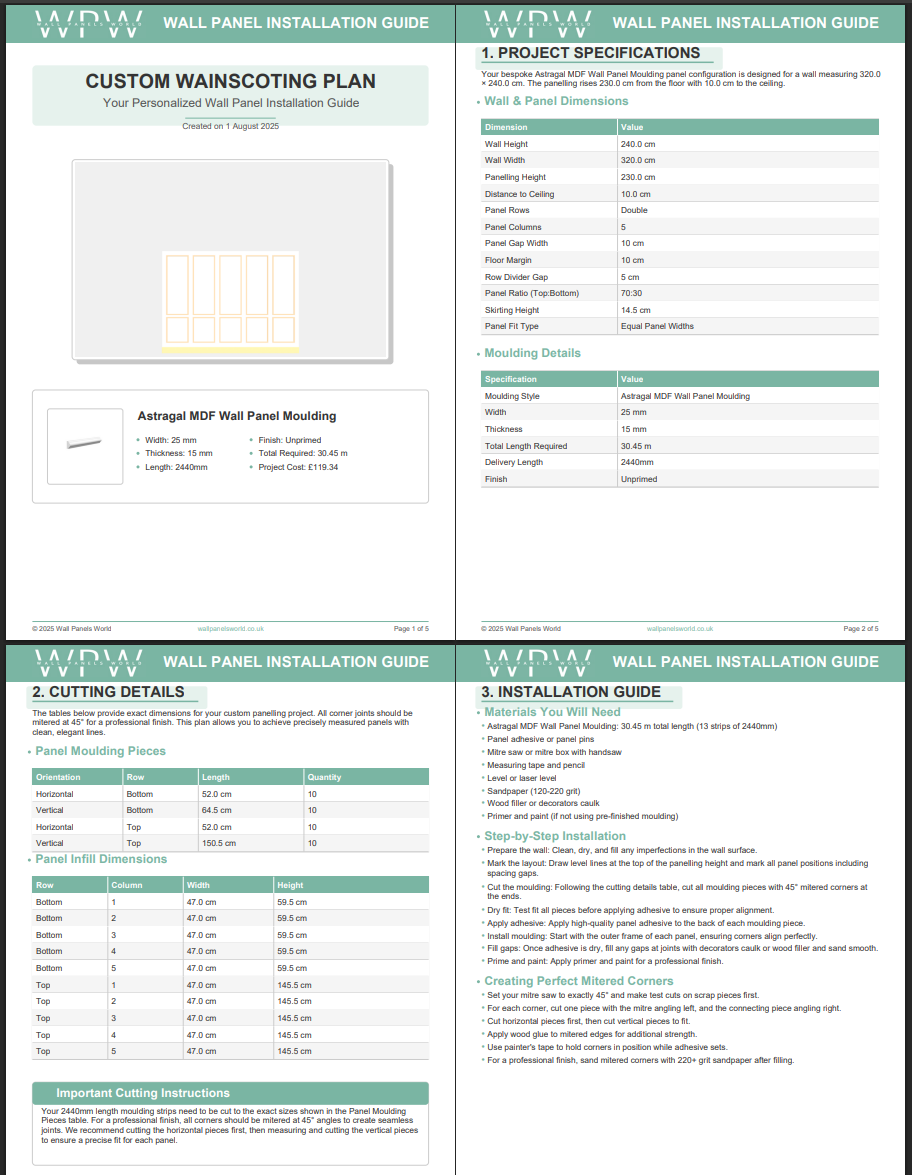
Both calculators generate exact material lists and provide PDF installation guides. You receive standard-length strips in the calculated quantities rather than pieces cut to your specific measurements.
The calculators account for waste and provide some buffer, but adding a couple of extra strips at checkout prevents running short during installation.
Installing wall panelling kits
Wall panelling kits simplify how many pieces you need but still require proper DIY skills. The work involves precision cutting, creating neat joints, and methodical assembly.
What the kit provides
Components arrive partially prepared but not ready to install. You'll receive strips cut to standard lengths that work with typical room dimensions, but final sizing and mitre cuts happen on-site.
Most installations require a mitre saw or box for clean corner joints, a spirit level for accurate positioning, wall panelling adhesive for fixing, and basic tools for measuring and marking.
Typical installation sequence
Install skirting board with mitred corners, creating the foundation for vertical strips
Position main vertical strips according to the layout, checking each piece for level
Fit panel mouldings within the framework, creating mitred joints at corners
Install dado rail across the top, ensuring it sits level and conceals any irregularities
Fill gaps, sand smooth, caulk joints, and apply paint if not using pre-finished components
Most installations take a weekend for an average room, depending on wall preparation requirements and chosen finish complexity. The moisture-resistant MDF handles typical indoor conditions without movement issues.
When to use backing sheets
Optional 9mm backing sheets solve problems with uneven walls but add complexity. They're worth considering when walls have significant irregularities that would show through the panelling strips. Note that backing sheets create a join line where they meet the dado rail, requiring filling and sanding for a seamless finish.
Custom designs
Many customers use kit components as building blocks for their own designs rather than following the standard layouts. The calculators support this approach by working out material requirements for custom arrangements.
Calculator customisation
The online calculators allow significant customisation while maintaining the convenience of calculated material lists. You can adjust panel dimensions, spacing, and overall layout to suit your specific requirements.
- Panel proportions and spacing
- Overall layout arrangement
- Wall dimensions and configurations
- Material quantities for non-standard sizes
The calculator generates a PDF showing your specific layout plus exact material requirements. You receive standard-length strips in the calculated quantities rather than pieces cut to your measurements.
Bespoke design service
For projects requiring completely custom profiles or unusual requirements, the in-house design team can create tailored solutions. This covers custom moulding shapes, non-standard dimensions, and complex layouts beyond standard kit capabilities.
Contact the design team at sales@wallpanelsworld.co.uk with your specifications and room details for guidance on custom solutions.
Getting started
Wall panelling kits provide a practical route to creating panelled walls without the complexity of sourcing individual components. The coordination problem is solved by ensuring all parts work together, while the assembly work remains in your hands.
The made-to-order approach means everything arrives fresh from machining, cut to work with your chosen design. The partial preparation saves time on material sourcing while leaving the precision work where it belongs.
Success depends on accurate measurement, careful planning, and methodical installation. The online calculators help with the planning side, but the assembly work requires confidence with tools and attention to detail for professional-looking results.